How to Use Midjourney: Complete Guide (2026) — 10 Steps from Zero to First Image, with Error Fixes
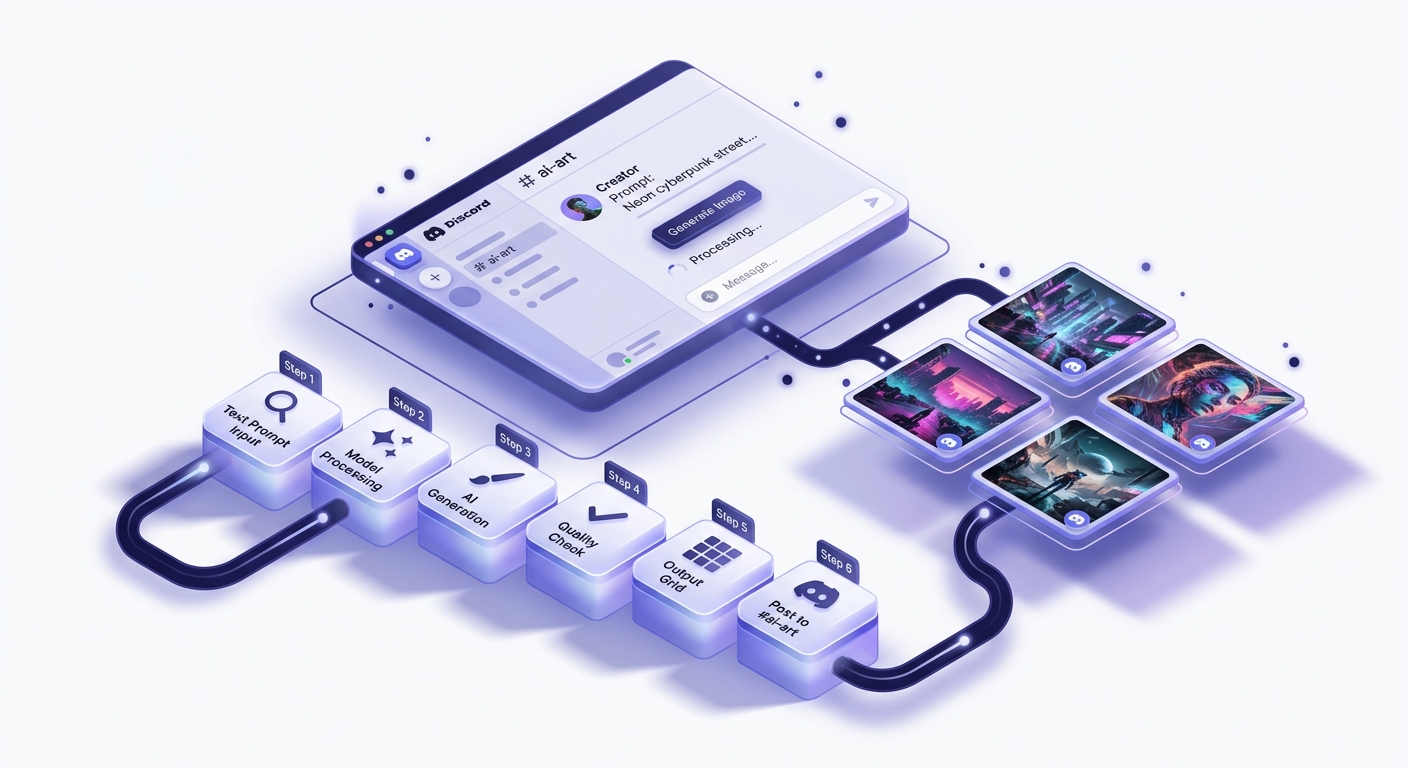
TL;DR: To use Midjourney as a beginner, create an account, subscribe through Discord, write a text prompt using the /imagine command, then refine results with parameters and image-to-image features to generate your first AI image in ten straightforward steps.
How to Use Midjourney: Complete Guide (2026) — 10 Steps from Zero to First Image, with Error Fixes
First time opening Midjourney and feeling lost between the all-English interface and Discord’s unfamiliar layout?
This guide is written for you. I’ll walk through how to use Midjourney from scratch, in the exact order you’ll actually operate — registration, payment, writing prompts, adjusting parameters, and image-to-image. Every step has specific instructions, and common errors are covered so you can troubleshoot on the spot. Follow along once and you’ll have your first image by the end.
One-line summary: Register Discord → link Midjourney → choose a subscription plan → type /imagine + your prompt → wait for output. The full flow takes under 20 minutes. The two hardest parts are your network environment and payment method.
Part 1: Before You Start — What You Need
Many people get stuck on the very first step, not because the process is hard, but because they haven’t prepared. Get these three things sorted first.
1.1 Network Requirements
Midjourney’s website (midjourney.com) and Discord are not accessible from mainland China without a VPN. A stable VPN is required throughout the entire process.
Practical notes from real usage:
- When registering Discord, you need a global (system-level) proxy — browser-only proxy often fails
- US, Japan, or Singapore nodes are recommended — lower latency and better stability
- If your connection drops mid-generation, the task won’t be cancelled. Refresh the page or go back to the channel to find your result
If your connection is unstable, test that you can open discord.com normally before starting registration.
1.2 Email Recommendation
Discord registration requires email verification. Use Gmail or Outlook — domestic Chinese email providers (QQ Mail, 163) occasionally fail to receive verification emails or get flagged as suspicious accounts.
After registering, bind a phone number immediately. This reduces the chance of your account getting flagged. Discord supports mainland China phone numbers (+86), though some carriers may not receive the SMS — a Google Voice or other overseas number works as a backup.
1.3 Two Entry Points: Web App vs. Discord
Midjourney launched a standalone web app in late 2023. For beginners, start with the web app — the interface is more intuitive and you don’t need to memorize commands.
| Entry Point | URL | Best For |
|---|---|---|
| Web app | midjourney.com | Beginners, everyday use |
| Discord | discord.com/invite/midjourney | Batch operations, community |
Both use the same account and subscription — generation quota is shared. Either works.
Part 2: Account Setup — Discord + Midjourney Full Flow
Midjourney doesn’t have its own account system. You log in using a Discord account. So the first step is registering Discord, then using it to log into Midjourney.
2.1 Register Discord
- Go to discord.com, click “Login” → “Register”
- Fill in username, email, password, date of birth (must be 18+)
- Complete the CAPTCHA (puzzle or image click)
- Click the verification link in your email to activate the account
- Return to Discord, complete the onboarding, and enter the main interface
After registering, go to User Settings → My Account and bind your phone number. This increases your security level and reduces repeated verification prompts.
2.2 Link to Midjourney
- Open midjourney.com
- Click “Sign In” in the bottom right
- Select “Continue with Discord”
- Discord will show an authorization page — click “Authorize”
- You’ll be redirected back to Midjourney’s web app — you’re in
If the authorization page won’t load, check that your VPN is running in global/system mode.
2.3 Choosing a Subscription Plan
Midjourney has no free tier — you must subscribe to generate images. 2026 pricing:
| Plan | Monthly Price | Annual Price (per month) | Fast GPU Hours | Best For |
|---|---|---|---|---|
| Basic | $10/month | $8/month | 3.3 hours | Light trial |
| Standard | $30/month | $24/month | 15 hours + unlimited Relax | Everyday use |
| Pro | $60/month | $48/month | 30 hours + Stealth mode | Commercial use |
| Mega | $120/month | $96/month | 60 hours | Heavy users |
Beginners: start with Basic ($10/month). Get the workflow running first, then upgrade to Standard if you need more.
Payment: Visa/Mastercard credit cards. Some Chinese dual-currency cards occasionally fail — Depay or Wise virtual cards have higher success rates. Alipay and WeChat Pay are not supported.
To subscribe: Midjourney web app → avatar (bottom left) → “Manage Subscription” → choose plan → enter payment info.
Part 3: Your First Image — Using /imagine
Once your account and subscription are set up, you’re ready to generate.
3.1 Web App (Recommended for Beginners)
- Log into midjourney.com and go to the main interface
- There’s an input box at the bottom of the page — type your description directly
- Press Enter or click Send
- Wait about 30–60 seconds — four candidate images will appear
- Click any image to enlarge. Choose U1–U4 (upscale a single image) or V1–V4 (generate variations)
The web app doesn’t require /imagine — just type your description. This is why it’s more beginner-friendly than Discord.
3.2 Discord Version
- Join the official Midjourney Discord server, or add the Midjourney Bot to your own server
- In any channel input box, type
/imagineand wait for the command prompt to appear - Enter your description in the
promptfield - Press Enter — wait for the bot to reply with images
Common beginner mistake: Typing directly in the channel without triggering /imagine first. The bot won’t respond. You must trigger the slash command first.
3.3 Writing Your First Prompt
For your first image, a simple English description is fine — no complex parameters needed. For example:
a cat sitting on a wooden table, soft morning light, photorealistic
Midjourney can understand Chinese prompts, but the results are less consistent than English. Build the habit of writing prompts in English.
If you’re not comfortable with English, translate your Chinese description with any translation tool and paste it in.
Part 4: Writing Prompts
Prompts determine image quality more than anything else. The same tool with different prompts can produce wildly different results.
4.1 Basic Structure
[Subject] + [Scene / Environment] + [Style / Mood] + [Technical Parameters]
Example:
a young woman reading a book, cozy coffee shop interior, warm golden hour lighting, film photography style --ar 3:4 --v 6.1
Breakdown:
- Subject:
a young woman reading a book - Scene:
cozy coffee shop interior - Style:
warm golden hour lighting, film photography style - Parameters:
--ar 3:4 --v 6.1
More specific descriptions = more controlled output. Vague words like “beautiful” or “nice” have minimal effect. Replace them with concrete visual descriptions: soft diffused light, shallow depth of field.
4.2 Style Keywords Quick Reference
| Style | Common Keywords |
|---|---|
| Photorealistic | photorealistic, DSLR photo, 35mm film, shot on Canon |
| Illustration | digital illustration, flat design, vector art |
| Anime | anime style, Studio Ghibli, manga |
| Oil painting | oil painting, impressionist, brushstroke texture |
| Cyberpunk | cyberpunk, neon lights, futuristic city |
| Minimal | minimalist, clean background, white space |
| Watercolor | watercolor, soft edges, pastel colors |
| 3D render | 3D render, Blender, octane render, CGI |
4.3 Weight Control
When a prompt has multiple elements and you want to emphasize one, use double colons :: with a number:
red rose::2 blue sky::1
This means the red rose has twice the weight of the blue sky — the rose will dominate the composition.
Higher numbers = more presence in the image. Negative weight (::−1) effectively excludes an element, but the --no parameter is usually more direct.
Part 5: The 6 Most Important Parameters
Parameters go at the end of your prompt, prefixed with --. Master these six and you can handle 90% of generation needs.
| Parameter | What It Does | Common Values | Example |
|---|---|---|---|
--ar | Sets aspect ratio | 1:1 / 16:9 / 3:4 / 9:16 | --ar 16:9 |
--v | Specifies model version | 6.1 (current main version) | --v 6.1 |
--stylize | Artistic stylization strength | 0–1000, default 100 | --stylize 300 |
--chaos | Result variety / randomness | 0–100, default 0 | --chaos 30 |
--seed | Fixes random seed for reproducibility | Any integer | --seed 12345 |
--no | Excludes unwanted elements | Any words | --no text, watermark |
Practical use cases:
- Phone wallpaper →
--ar 9:16 - Wide cover image →
--ar 16:9 - Want more creative results →
--chaos 50or higher - Found a good image, want to refine → get the seed with
/show, then use--seedto lock it - Text or watermarks keep appearing → add
--no text, watermark, logo
Part 6: Image-to-Image (Using Reference Images)
6.1 What Is Image-to-Image?
Image-to-image (also called “image prompting” or “img2img”) means uploading a reference image as input so Midjourney generates new images based on it. Common uses:
- Keep the composition or color palette of one image, change the style
- Use your own product photos to generate styled scene mockups
- Reference a character’s appearance to generate different poses or outfits
6.2 Step-by-Step
Web app:
- Click the image upload icon to the left of the input box
- Upload your local image and wait for the upload to complete
- The image URL will be automatically inserted into the input box
- Continue writing your prompt after the link and send
Discord version:
- Drag an image directly into the channel input box, or click ”+” to upload
- Send the image and wait for the upload to complete
- Right-click the uploaded image → “Copy Link” to get the image URL
- Type
/imagine, then paste the image URL first in the prompt, followed by your description
Format example:
https://cdn.discordapp.com/xxx.jpg a woman in a red dress, studio lighting --iw 0.8
6.3 The --iw Parameter
--iw (Image Weight) controls how much the reference image influences the output. Range: 0–3, default: 1.
--iw 0.5: Weak reference influence — prompt dominates--iw 1: Balanced (default) — reference and prompt share influence equally--iw 2: Strong reference — output will closely follow the original composition and color
Tip: On your first image-to-image attempt, use the default (omit --iw). If the result feels too different from the reference, increase --iw. If it looks too similar with no variation, decrease it.
Part 7: Troubleshooting FAQ
Q1: Sent a prompt but the bot didn’t respond at all — what’s wrong?
Most likely you sent the message in the wrong channel, or didn’t trigger the /imagine command.
Checklist:
- Confirm you’re in a channel where the Midjourney Bot is present (Discord version)
- Confirm you typed
/imagineas a command, not plain text - If using the web app, refresh the page and try again
- Check your VPN is active
If all of the above check out, Midjourney’s servers may be temporarily congested — wait a few minutes and retry.
Q2: Image quality is poor — blurry or distorted. How do I improve it?
The main cause is a too-short or too-vague prompt. Try:
- Add specific visual details — lighting, materials, composition
- Add
--v 6.1to ensure you’re using the latest model - Increase
--stylize(e.g.,--stylize 200) - For distorted figures: add
--no deformed, ugly, bad anatomy
Q3: Image upload fails and just spins. How do I fix it?
Network issues are the primary cause. Solutions:
- Check that your VPN connection is stable — switch nodes and retry
- Compress the image (keep under 5MB)
- Convert to JPG format (PNG can be slower to upload)
- On Discord, try uploading the image to another channel first, then copy the link
Q4: Can’t enter the Midjourney Discord server — says verification required. What do I do?
Discord applies security verification to new accounts. Steps:
- Complete email verification and phone number binding
- After entering the server, complete the rules acknowledgment in the “Rules” channel
- If prompted to wait, the restriction usually lifts within 10 minutes
- An account registered less than 24 hours ago may hit access limits — wait a day and try again
Q5: Subscription payment keeps failing — card declined. What can I do?
Chinese credit cards (including dual-currency cards) have inconsistent success rates on Midjourney. Recommended solutions:
- Use Depay, Wise, or OneKey Card virtual cards — much higher success rates
- Make sure there’s enough balance (keep $2–3 buffer above the subscription amount)
- Use a US billing address (any US address works)
- If repeated failures occur, try a different browser or clear cookies and retry
Q6: How do I check my remaining generation quota?
Type /info in Discord — the bot will reply with your account details, including:
- Current subscription plan
- Remaining Fast GPU hours
- Relax mode status
- This month’s usage
On the web app, go to avatar (bottom left) → “Manage Subscription” to see detailed usage statistics.
Part 8: Quick-Start Checklist (10 Steps)
Check each step in order — complete each one before moving to the next:
- Step 1: Confirm your VPN works and can open discord.com normally
- Step 2: Register a Discord account with Gmail or Outlook
- Step 3: Complete email verification and bind a phone number
- Step 4: Open midjourney.com, click “Sign In with Discord” and authorize
- Step 5: Go to “Manage Subscription,” choose the Basic plan ($10/month), and complete payment
- Step 6: Return to the Midjourney web app and type your first prompt in the bottom input box
- Step 7: Wait for output (~30–60 seconds) and view the 4 candidate images
- Step 8: Click a satisfying image and choose U (upscale) or V (variations)
- Step 9: Try adding
--ar 16:9 --v 6.1to the end of your prompt and compare the difference - Step 10: Upload a reference image and try image-to-image generation
Complete these 10 steps and you’ve mastered Midjourney’s core workflow.
Summary
How to use Midjourney in a nutshell: prepare your network → register Discord → link Midjourney and subscribe → generate with /imagine or the web app input box → refine with parameters and prompts.
The most common blockers are network setup and payment. Everything else follows logically from this guide. For errors, check the FAQ in Part 7 — it covers 90% of common issues.
If you’d like to compare Midjourney with other AI image tools to decide if it’s the right fit for you, see the full evaluation of AI image generation tools for more context.
If this guide was helpful, feel free to bookmark it. Got questions or experience with other tools to share? Drop a comment below.